Drum Programming 101 – How to Create Beats in Your DAW
Drum Programming is an essential part of electronic music production. So, drawing MIDI notes, and creating grooves as the foundation of your track is one of the most impart aspects of electronic music making. Don’t know where to start? Look no further!
Programming vs. Playing
Drum programming (or Drum sequencing) opposed to playing a drum beat through a MIDI controller is often a much more conscious way of creating a beat. You draw every single note into a MIDI clip in your DAW. You see the beat with its elements visualized.
On the one hand, it’s a bit more tedious and micromanaging than playing the beat. On the other hand, it gives you the ultimate control over every single note. So let’s get started!

Drum Programming: Tempo and Drum Kit sounds
The first thing you have to decide on for programming drums, before anything else, is your beat’s tempo. It is mostly described in beats per minute – BPM. If you want to find out the tempo of a song, play it and keep counting 1,2,3,4.
You’ll find yourself falling on a certain tempo where you clap along the track. For most songs, that is the tempo.
Every genre has a general tempo area, where most of its tracks live: Techno lives between 125 and 140, old school Hip Hop best works around 90 to 95, and Trap or Drill beats usually groove the most between 140 and 150.
Then pick a drum kit. Most drum beats usually revolve around three sounds: kick, snare, and Hihat. The kick is the heartbeat, the snare is the clap, and the Hihat is the shakers and the sizzles.
Like tempo, drum sounds are often very similar among tracks in a genre: 808 drums for Hip Hop, 909 drums for old-school Techno, soft Acoustic Drums for pop, and rough acoustic drums for Rock and Metal. Take your time to pick a drum kit, you’ll be stuck with it for a while!

Creating your first beat
Once you’ve picked your drum kit and loaded it into a MIDI track in your DAW, it’s time to create an empty MIDI track for drum programming.
Once you open that, you’ll most likely be presented with the piano roll. There is a piano on the left side, running vertically, and next to it is a grid. On top of the grid, there will usually be numbers, which represent bars.
To get going with drum programming, set the Tempo to 130, pick a drum kit in your DAW and let’s draw your first MIDI notes! In some DAWs like Ableton Live, you do that by double-clicking. Others like Logic Pro have a dedicated drawing tool, you need to activate.
You’ll probably find out very soon that it is crucial where in the grid you put those notes, both horizontally and vertically. For drum programming, the latter determines which sounds are actually triggered.
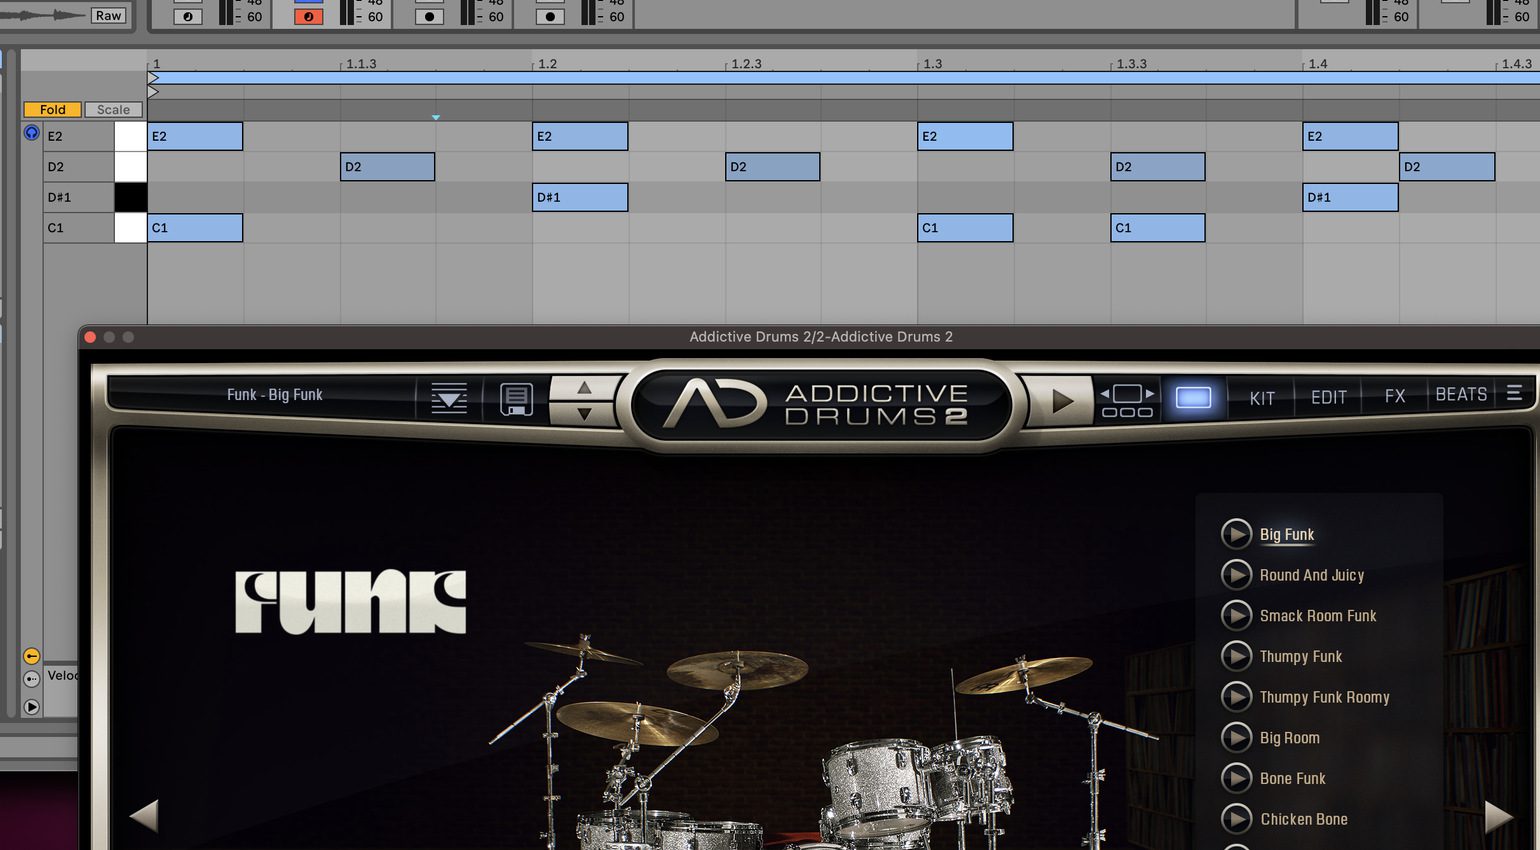
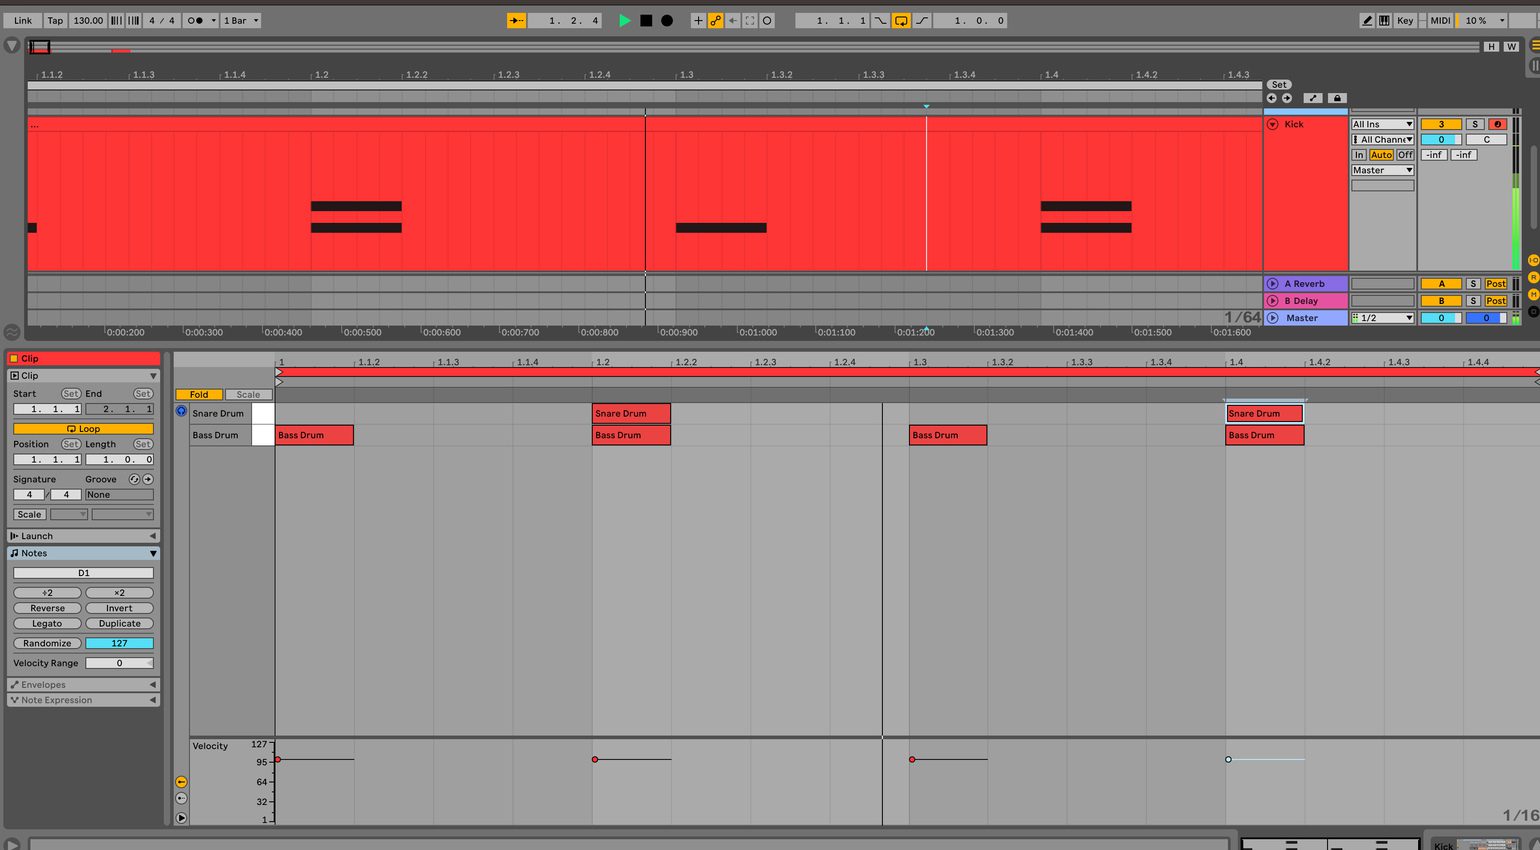
For example, an E2 triggers a different sound than a D3. Let’s start with a kick drum. Most drum kits have their kicks at C1 (NOT C-1!). Set four kicks, as shown in the picture. And then two snares above kick 2 and 4. Techno, here we come!


Drum Programming – The groove
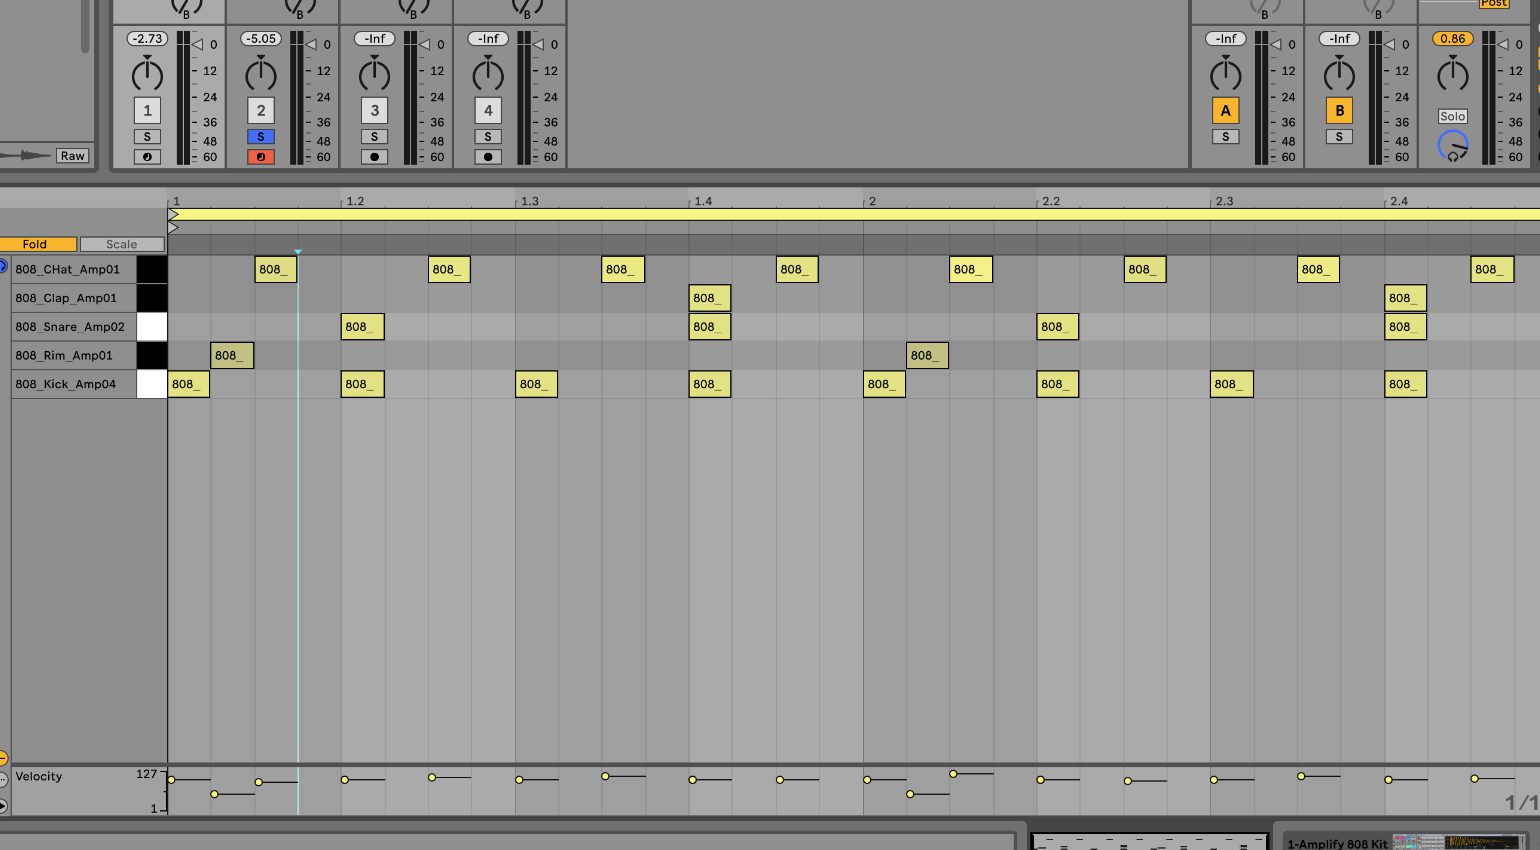
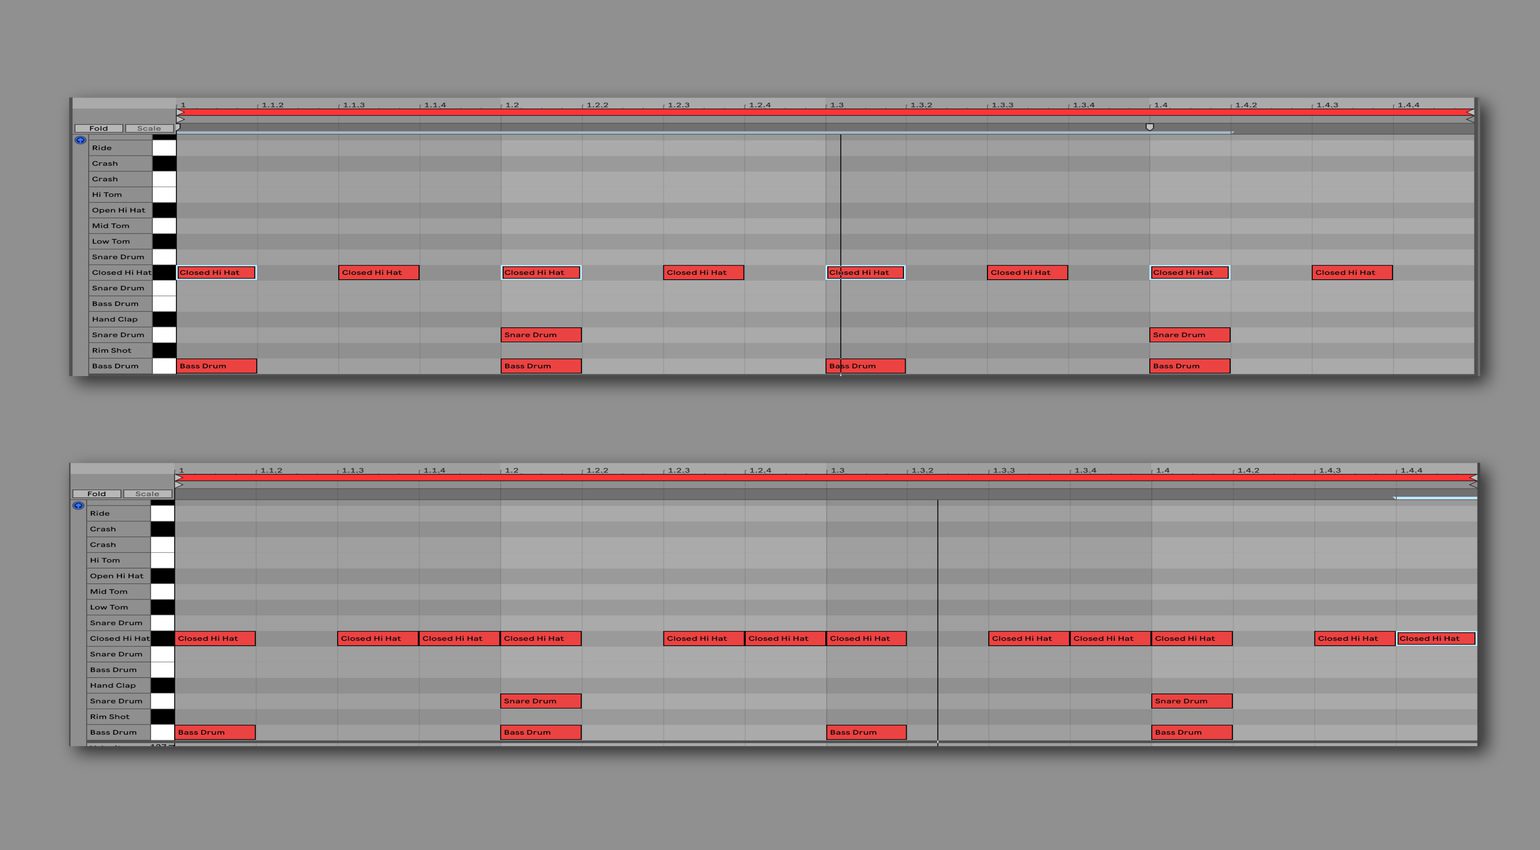
The most important part of a groove, in my opinion, is the Hihat. Depending on how you do drum programming, its rhythm can wildly alter a groove’s feeling, even with the exact same kick and snare pattern behind it! Let’s draw in a couple of Hihat notes (see screenshot) at F#1.
To illustrate how much of a difference the Hihat can make, try doubling the Hihat notes or try moving them in the grid. The beat will feel very different, depending on your version!
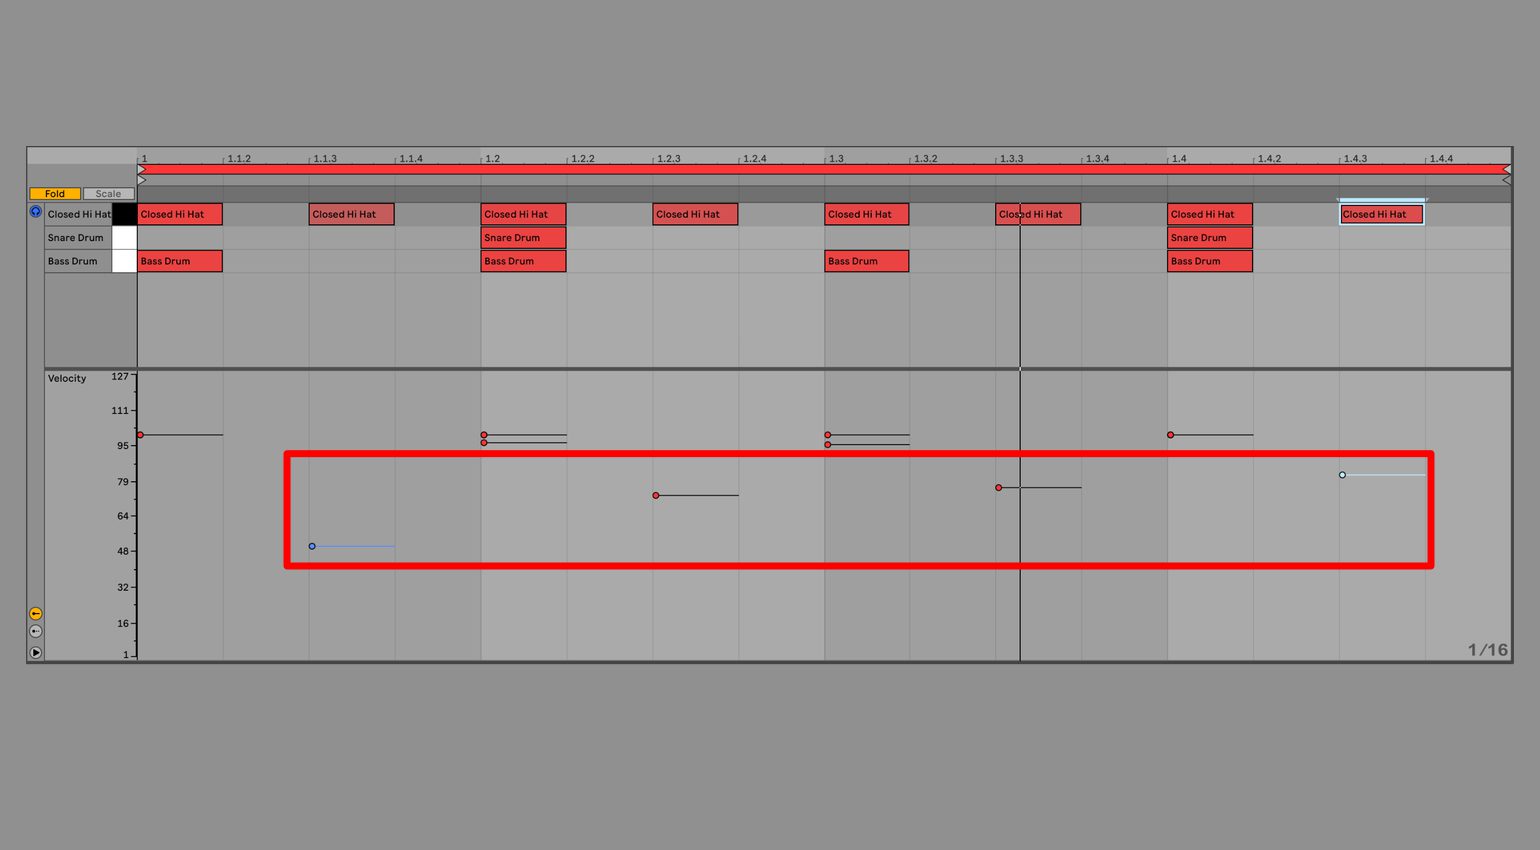
Hihats are also where you want to start with varying velocities. This parameter alters a sound’s volume, just like a drummer would do naturally because she isn’t a machine playing every note with the same intensity.
Snare hits, and kicks even more, are rarely altered in their velocity in most electronic music genres, as they represent the rhythmic foundation – and you’d want to keep that steady! But creating even slight variations in velocities with the hi-hat notes can bring a groove from good to badass.

Bars, Note lengths, and time signature
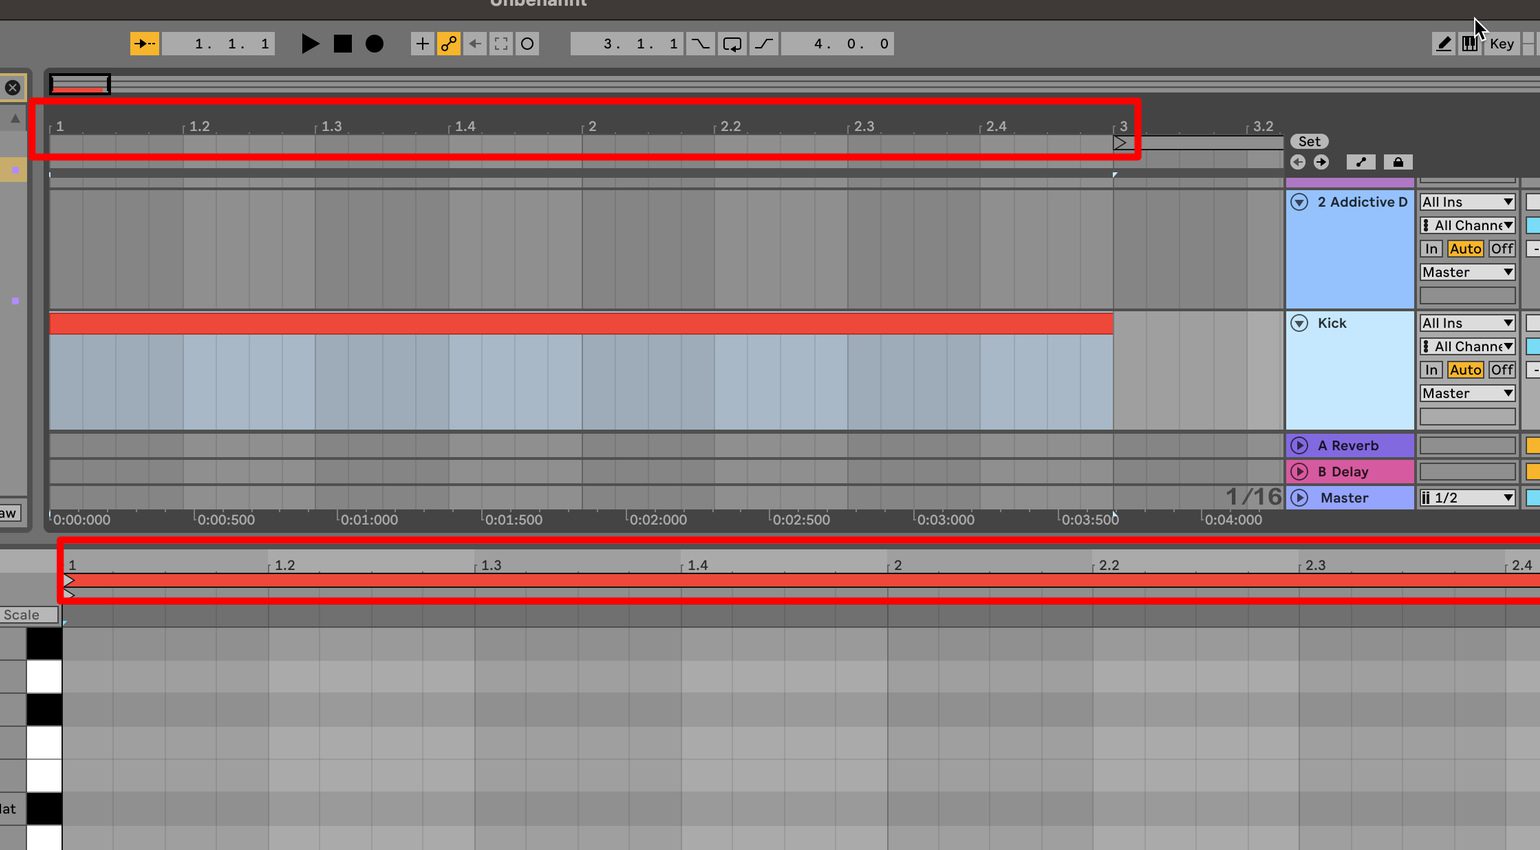
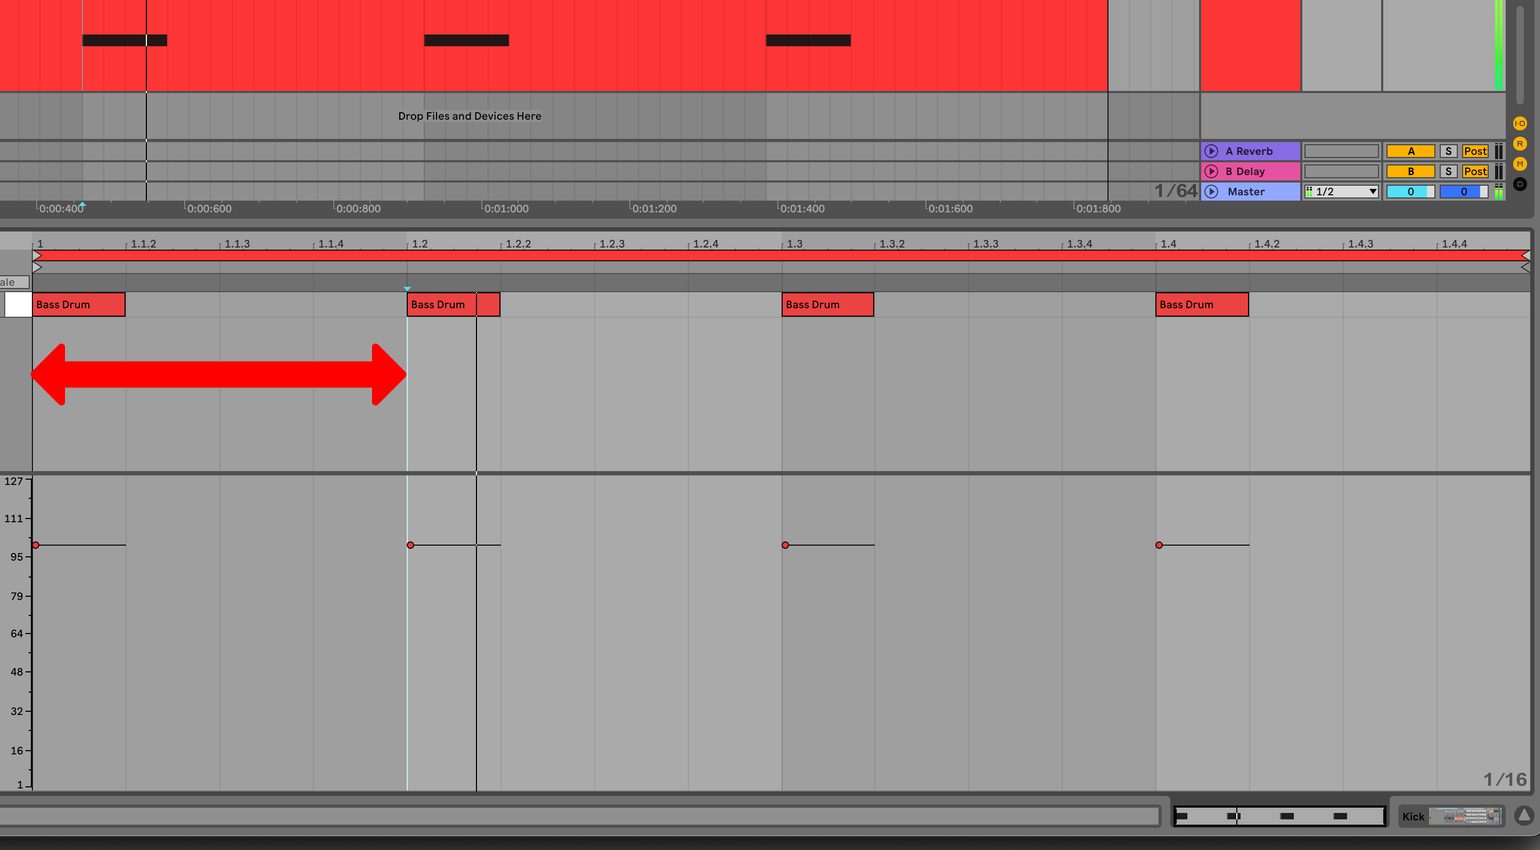
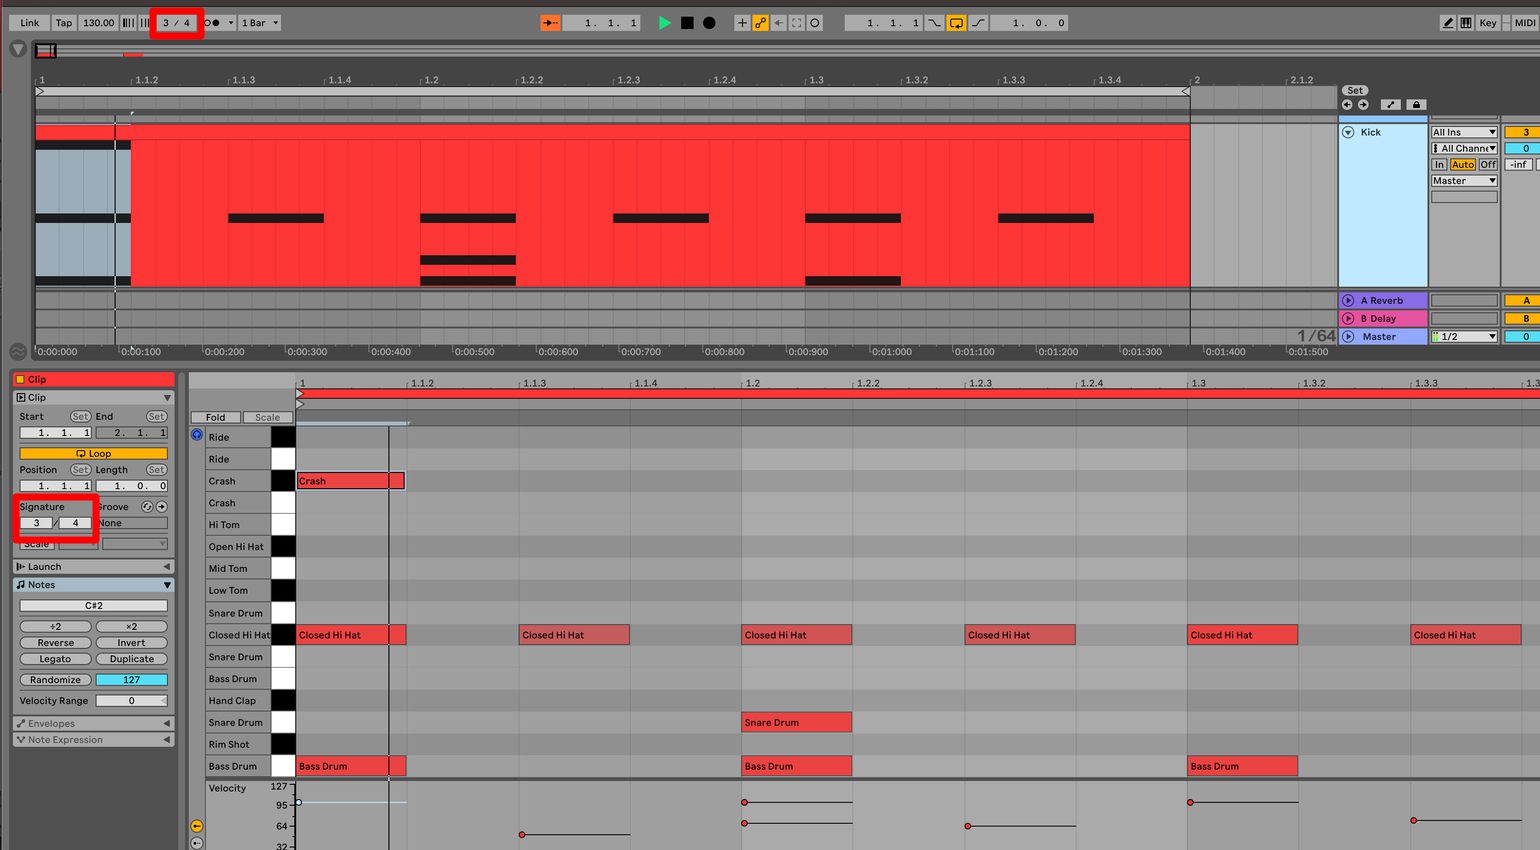
You’re probably wondering at this point what all these numbers and lines in your MIDI clip mean for drum programming. The numbers on top represent bars. Remember when we counted to four to find the tempo of a song earlier?
That unit, counting from one to four and then repeating, is called a bar. And those for numbers are called beats.
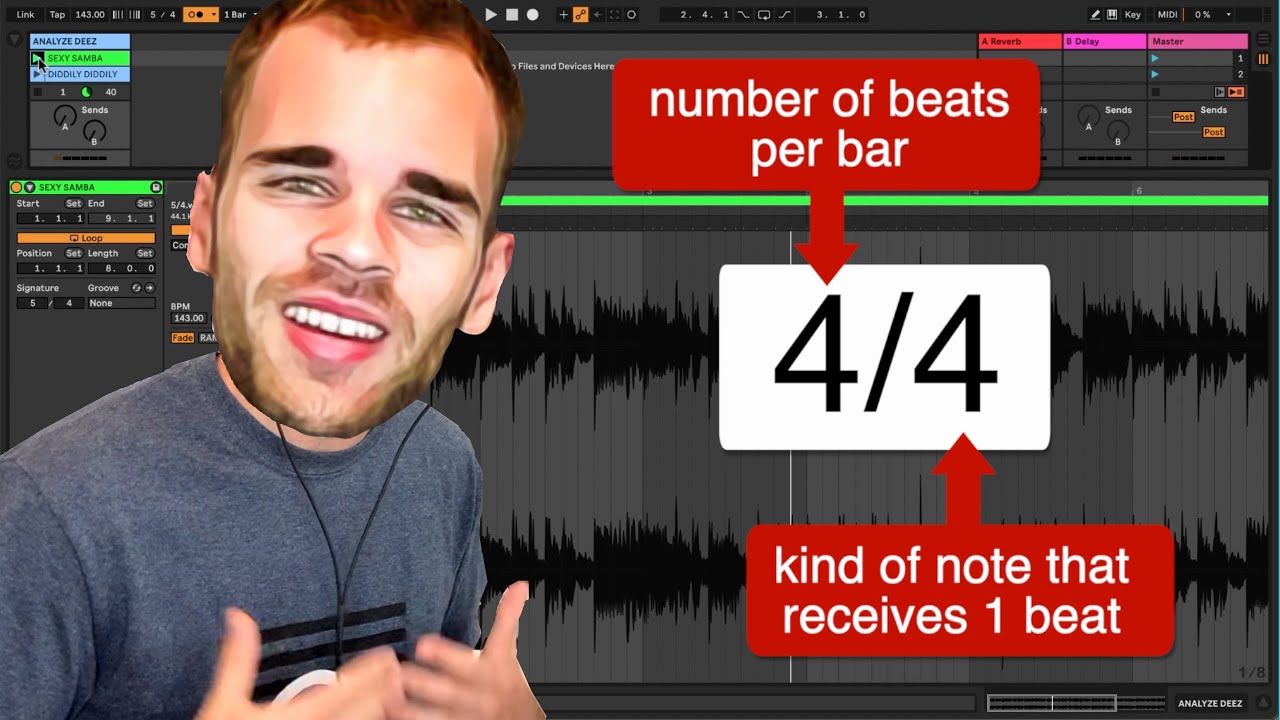
Having four beats within a bar is called a time signature, 4/4 (Four-four) in this case. It’s by far the most common time signature in Western music. But if you’re counting along a song and four equal-spaced beats never seem to work, try 3 or 5 or 7!
In the case of 3, the time signature would be 3/4 – which would give the groove a bit of a Waltz feeling.
If we have one bar with four equally spaced beats, then we could conclude that each beat represents a quarter of the beat. Which is what the note length of the four beats is called. Remember when we put the Hihat notes between the kicks on the beat?
Let’s double the available equally spaced notes from four to eight. We’re at eighth notes! If you count “1 and 2 and 3 and 4 and”, every „and“ would represent an eighth note.
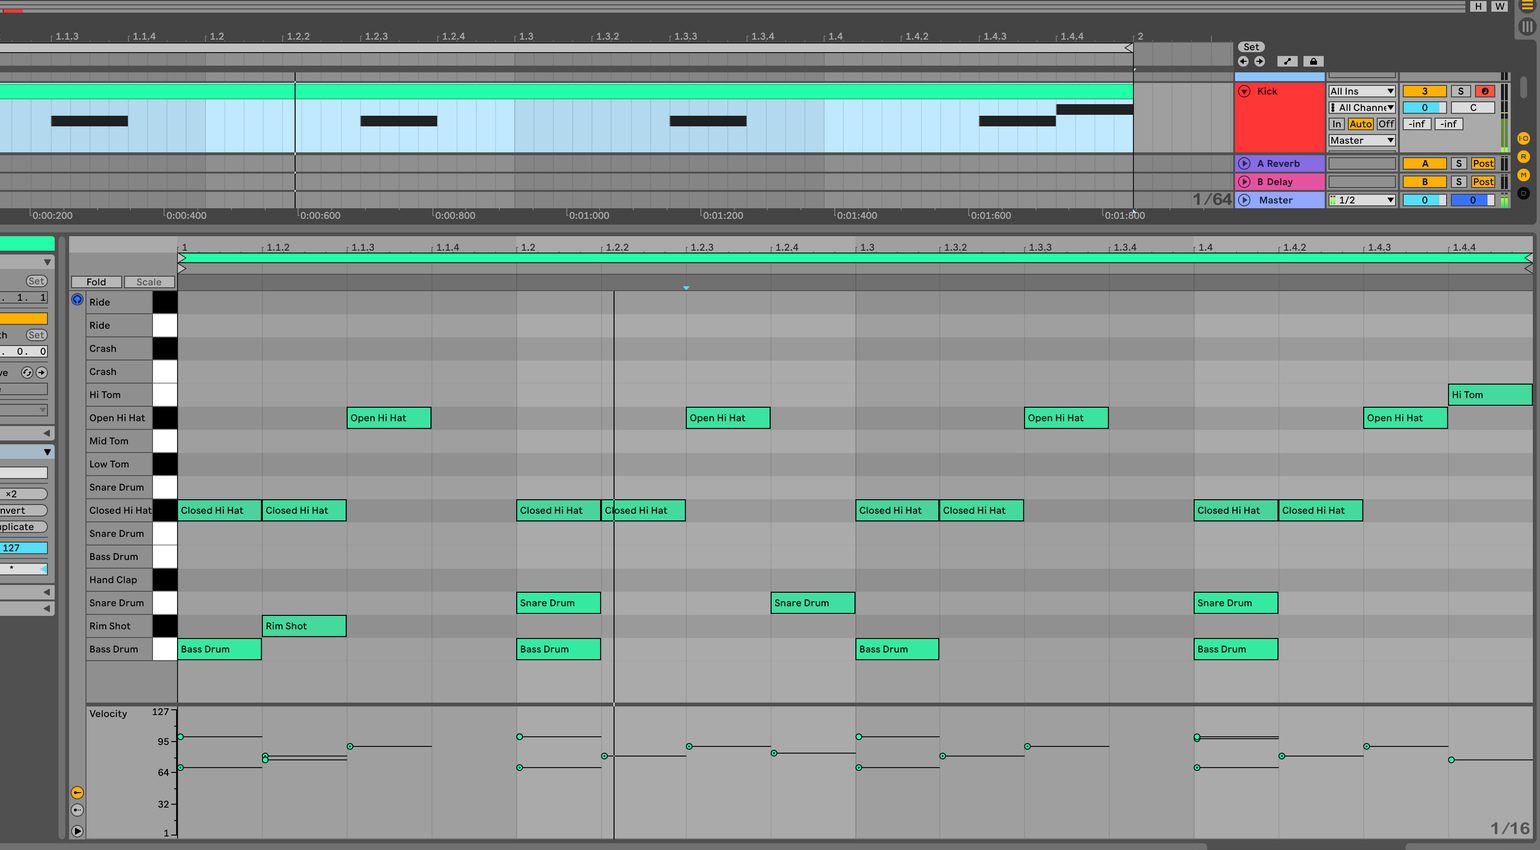
Which is where we set the Hihat notes. You’re probably seeing where this is going. You could double the amount once more and end up with sixteenth notes! Which is most likely your DAW’s grid setting.
Get your beat moving by drawing more Hihat notes on the grid in different sixteenth notes positions – advanced drum programming!
Conclusion
Drum programming is the foundation for most electronic music genres. Even if it might feel stale and robotic initially, you’ll find over time that little things like varying velocities, tiny amounts of Swing, little drum fills, and breaks can make all the difference.
And if you’re looking for inspiration in many different electronic genres, „Beat Dissected “ from Attack Magazine is as thorough as it gets. Happy grooving!
More Workshops:
- Every Weekend Workshop
- How to use a MIDI Controller
- More on Ableton
- “Beat Dissected” at Attack Magazine
Videos:
*This post about Drum programming contains affiliate widgets. When you buy a product via our affiliate partner, we receive a small commission that helps support what we do. Don’t worry, you pay the same price. Thanks for your support!
- Do your drum programming at home!: Hans Denis Schneider, Shutterstock
- A starting point for drum programming: a techno beat.: Julian Schmauch
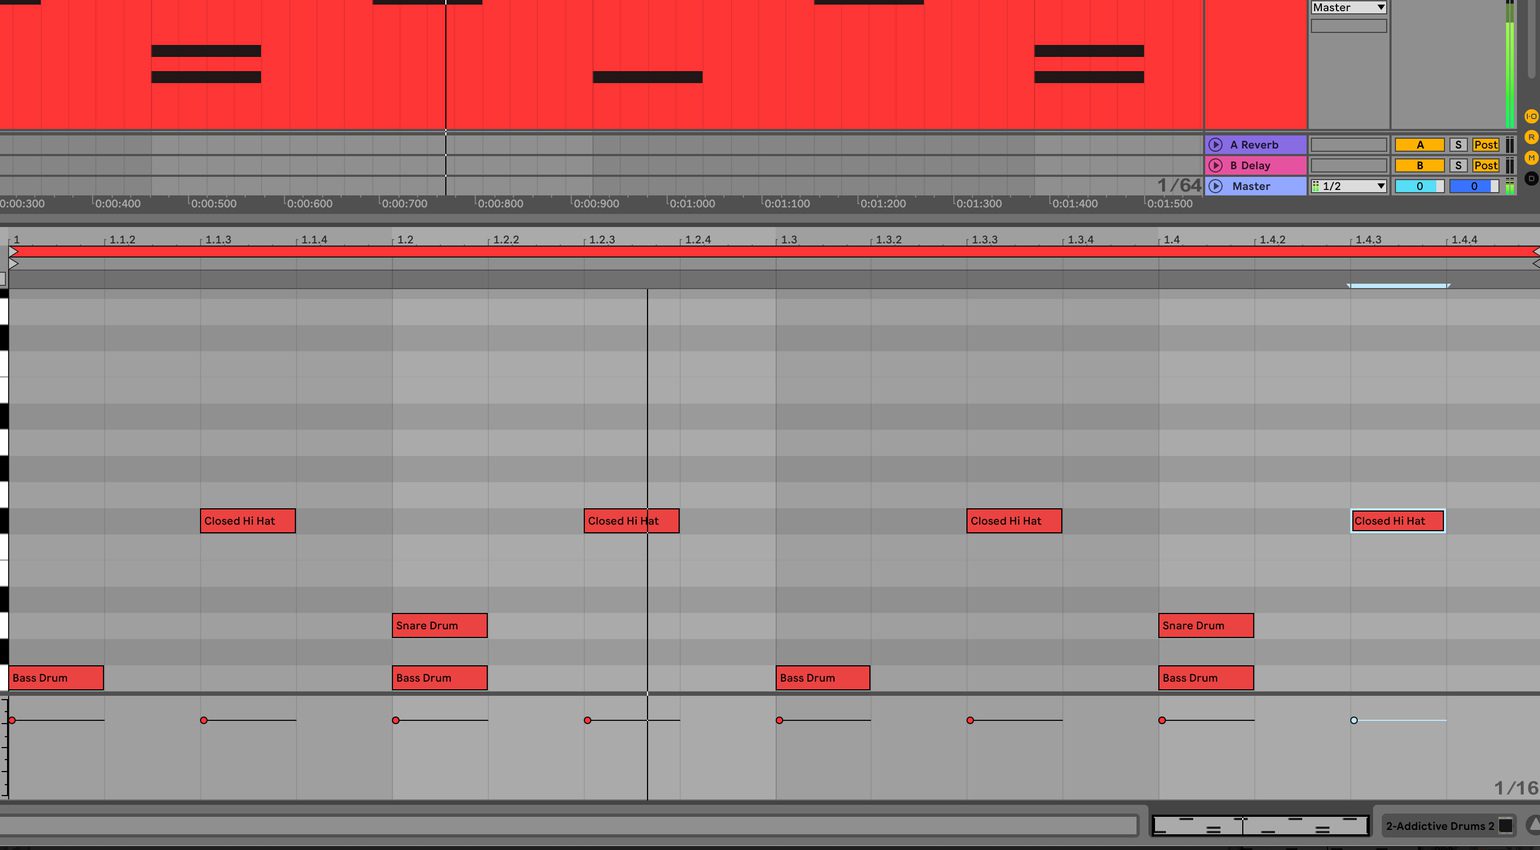
- A drum beat for Rock music with Addictive Drums 2.: Julian Schmauch
- A DAW like Ableton displays the grid in its Arrangement (top) and in the clip editor (bottom).: Julian Schmauch
- Drum Programming 101: A Techno Beat: Julian Schmauch
- The most common Hihat pattern in Techno: Julian Schmauch
- Same Kick and Snare pattern, different Hihat rhythms - wildly different groove! : Julian Schmauch
- In Ableton Live, changing velocities in drum programming happens here. : Julian Schmauch
- The distance between 1 and 1.2 is a quarter note. : Julian Schmauch
- In Ableton you can have a global time signature (top) and a different one in each clip (bottom). : Julian Schmauch
- Techno beat with many different sixteenth notes and velocities.: Julian Schmauch
One response to “Drum Programming 101 – How to Create Beats in Your DAW”
 4,3 / 5,0 |





I am a rock artist using Studio One. I would like to record acoustic drums and manipulate those so they dont sound fake. Can you help with that?